Is your self-care routine really head-to-toe? If the toe part’s been missing, it’s time for a DIY pedicure that will have your friends asking for the name of your spa and how much you paid for the fancy footwork.
Be sure to have your camera ready to immortalize their facial expressions when you tell them you did an at-home pedicure on the cheap. Who doesn’t love a top-of-the-line pedi performed by a licensed aesthetician? Your pocketbook, that’s who—or more precisely, what. You get the idea.
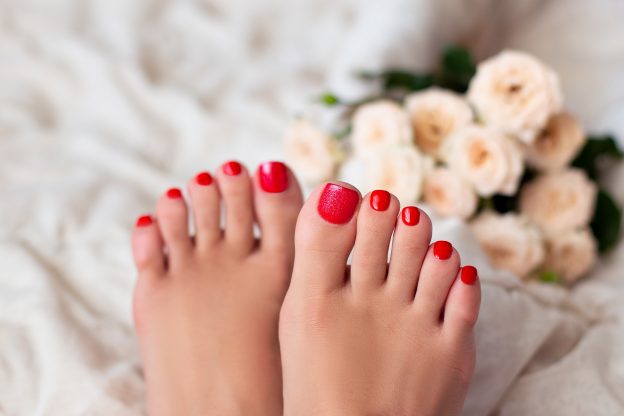
Those spa treatments can really add up, so why not try your hand at a home pedicure that aims high on quality but low on cost? If done right, you’ll be looking down at two beauties you barely recognize. That smooth skin. Those cared-for cuticles. Those pretty polished nails. You’ll be so proud of your work you’ll be looking for all sorts of excuses to go shoeless. If it’s spring or summer, make a spectacle out of those babies; they deserve an audience.
The idea of giving yourself a professional-grade pedicure shouldn’t strike fear deep within your soul. You’ve got this. Once you’ve gathered up the proper tools and products, all you need to do is follow six easy steps. Read on for how to do a pedicure at home and be smitten with the results.
1. Those toenails need a hard reset. Start with demolition and restoration.
Yeah, we said it. Someone had to. What were once nicely contoured and freshly polished nails now resemble the hood of a car that’s been through a hailstorm or two and desperately needs a paint job. Let’s get that keratin cleaned up and prepped for a long-overdue pedi.
Nail polish remover is your best friend when scraping off those lacquer leftovers. With a little elbow grease, you should be able to eradicate those seemingly indestructible specks of color. Once your nails are graffiti-free, use clippers to cut those buggers down and a file to sculpt them into the desired shape. Brush or blow any dust away after your miniature sandblasting is complete.
2. Make your feet more pliable with a skin-softening soak.
If it’s been a while since your last pedicure, your feet might be a little resistant to your wiles. Hardened skin and calluses bordering on calcification are going to need a little loosening before you move to the next step of your DIY pedicure.
We know what you’re thinking: This sounds like a job for a professional pedicurist. Trust us, you don’t need a spa. Go with our Original Exfoliation Foot Peel and Moisturizing Foot Mask instead. Our foot peels contain enzymes designed to speed up the peeling process (spoiler alert: that’s Step 3), while our foot mask provides maximum after-peel hydration.
Our pedicure foot soak only takes 10 to 15 minutes, and the cypress wood and fresh citrus scents will give you sea breeze vibes. Just imagine you’re lazing in a hammock on the beach while your feet prune up and become more pliable.
3. Use an exfoliating peel to disintegrate sandpaper-like dead skin and knotty calluses.
Articles about homemade pedicures usually recommend all sorts of heavy-duty tools to scrub away dead skin and file down calluses. We’re here to tell you there’s a better way—our Original Exfoliation Foot Peel.
Don’t end up with exfoliating elbow (wink, wink) from furiously rubbing your rough soles into submission with a callus remover or pumice stone. What good is a DIY pedicure if you’re laid up in bed with a pinched nerve? Let our peel do the work while you spend an hour reading, picking the perfect polish or shopping for new sandals online.
Just slip the gel-filled plastic booties on your freshly soaked feet and let the blend of 16 natural extracts work their smoothing magic. We recommend a second soak a few days later to speed up the peeling process. After the peeling starts, a gentle massage with our baking soda-based foot scrub will have your feet pedi-ready.
4. Give your cuticles the VIP treatment with oil.
Cuticles are perhaps the most overlooked part of a self-pedicure, but the pros know better than to skip this very worthwhile step. Depending on their appearance, these conspicuous crescents of clear skin can dial up or drag down your foot appeal.
Cuticles actually play an important role in keeping your nails protected from bacteria and become more noticeable as your nails grow. You’ll want to massage them with oil before entering the home stretch of your at-home pedi.
There are countless cuticle oils and creams vying for your dollars, but olive oil from your pantry or cupboard will do just fine. Massage the oil into your cuticles and then use a cuticle pusher, stick or one of your nails to lightly push them back. Tending to cuticles is a lot like plucking eyebrows—don’t get carried away! Once they’re tucked back and looking tidy, it’s time to moisturize.
5. Give the skin on your feet a healthy luster with a moisturizer.
As we’ve noted in previous blog posts, your feet are real workhorses—and it shows. They flake and swell and blister and dry out. By this point in your DIY pedicure, though, your feet should be looking fab. A good moisturizer can make them look even fabber.
If you have 15 minutes to spare, our Moisturizing Foot Mask is hard to beat. One of the best natural foot moisturizing products on the market, the mask is specially formulated for maximum hydration. The long-lasting effects will make you a believer.
Looking to keep this step simpler? That’s OK, too. Grab a highly rated moisturizer or cream and apply generously from heel to toe, instep to sole. There’s no such thing as over-moisturizing when it comes to your feet, so layer it on!
6. Time for the wholly trinity—base coat, polish and top coat.
You’ve done so much hard work to make your tootsies look terrific. If you skimp on this step, the D in your DIY pedicure will stand for destroy instead of do.
If you’ve recently applied foot cream or lotion, be sure to wipe your toes clean before applying a clear base coat. This thin coat won’t take long, but there are several long-term benefits. A base coat creates a barrier between your nails’ natural oils and the polish, which will adhere much better.
Once the base coat is dry, it’s time for the main event: coloration. Shake that bottle, twist it open and steadily brush the polish on in vertical strokes. Two thin coats back to back for best results. Undecided about which color to rock this season? How about a denim blue, dusty olive or antique peach?
Alas, the top coat is the crowning moment of your high-quality home pedicure. Don’t forget a horizontal swipe across the end of each nail to seal the deal. After the top cost is dry, you can even dip your feet in cold water to speed up the hardening process.
Congrats! You’re all done. Enjoy marveling at your marvelous work.