There’s a right way—and a plethora of wrong ways—to do an exfoliating foot peel. But if baby soft feet are what you’re after, our definitive guide of dos and don’ts is your best bet for the best results.
Foot peels are all the rage these days, and Baby Foot has earned hordes of devoted fans spoiled by the unparalleled softness it brings to their soles. If you’re a first-timer, rest assured our peels are safe for you and never tested on animals. While there are plenty of imitators, there’s only one Baby Foot.
Even with a trusted brand like Baby Foot, you might still be nervous about soaking your feet in gel that will trigger the multi-day molting process. That’s totally understandable, but it’s not as scary as it looks. In fact, when done correctly, most customers unearth stunningly smooth skin hiding beneath the cracks and calluses.
As with all products, it pays to follow the instructions. But if those got thrown out or overlooked, don’t guess your way through it. Here are our essential Baby Foot peel tips to help you find footopia and become a permanent resident.
Follow These Foot Peel Dos
Ready to do your at-home foot peel? Fantastic. Be sure to give yourself plenty of time. From beginning to end, the process takes about two hours. You’ll also want to find a comfortable spot to lounge while the gel in your foot peel booties works its magic. It’s OK to walk around in the booties, but we recommend staying seated, if possible.
That covers the basics. Now let’s get down to the nitty gritty of your Baby Foot treatment. Follow these guidelines, and your shriveled soles will be singing hallelujah in no time.
1. Start by removing toenail polish.
Take a quick glance at your toenails. Are there specks of color visible? If you see any remnants from your last coat, grab your nail polish and scrub those tiny keratin canvases clean.
If your feet have been freshly pedicured, you may want to wait to do your peel. Our specially formulated gel includes 16 natural extracts, some of which contain fruit acids like citric acid and glycolic acid to break down dead skin cells. Salicylic acid and lactic acid, which cause a sloughing effect, are also Baby Foot ingredients. These acids can dull or strip your polish while soaking.
2. Wash your feet and briefly soak them before peeling.
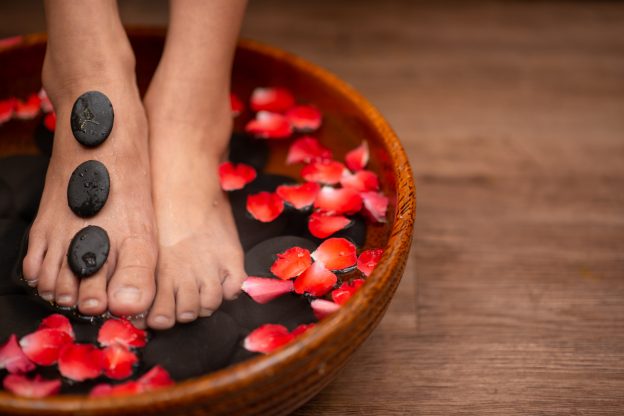
Now that your toes are polish-free, it’s time for a quick wash and soak. Clean your feet—not just the soles—with soap and water. If possible, use a soap with moisturizer since your feet will soon be on the fast track to Flakyville. After your feet are sparkling clean, let them soak in warm water for 15 to 20 minutes. Water helps to soften your feet and allows the gel to penetrate better.
Don’t want to break out the soaking basin? Take a cue from Baby Foot veterans who bathe or shower right before their foot peel. Strategic skin care at its best.
3. Only leave the peel on for one hour.
Remember those Baby Foot instructions we referenced above? When it comes to foot peels, it’s best to stick to the script. Don’t cut the treatment short or leave the gel-filled booties on too long. Those who leave the peel on for more than an hour do so at their own risk and could experience redness, burning or irritation.
Once the hour is up, remove the plastic booties and rinse your feet thoroughly. We don’t recommend applying lotion until after the peeling process is complete. If the dryness is absolutely driving you crazy, use an oil-free moisturizer sparingly.
4. Soak your feet daily after the peel.
Some Baby Foot fans say a daily soak is the way to go after your foot peel treatment. We don’t disagree. While it’s not necessary, a warm foot bath can be a nice way to promote peeling and wash away dangling debris. Just 15 minutes a day for at least seven days should do the trick. Why not start this habit and keep it going? Feet were meant to be soaked.
5. Share your Baby Foot peel pictures on social media and tag us.
Your feet will likely start peeling within a few days of the treatment. Minor flaking typically morphs into a white sheath of old skin that gradually separates from your soles, breaks up and falls off. (Our socks are great at containing the mess BTW.) Sometimes the peel patterns are just plain mesmerizing, so be sure to take pics. And don’t forget to tag us on social media when you post them!
Avoid These Foot Peel Don’ts
We’ve covered the Baby Foot peel dos. But we’d be remiss if we didn’t also shed some light on the don’ts. You might be surprised by some of the wild questions we get about using our exfoliating foot peel. Based on our research, some of you are asking Google if it’s OK to use Baby Foot on your face. Our answer: an emphatic no! It’s a FOOT PEEL. Here’s a rundown of things you shouldn’t do with foot peels:
- Don’t use Baby Foot if you have cuts or sores on your feet. Those acids we mentioned earlier don’t agree with open wounds. Ouch. Just ouch.
- Baby Foot isn’t meant for your face or hands. There are plenty of skin care products out there if you want to exfoliate the skin on your face and hands. Baby Foot isn’t one of them.
- Don’t forcibly remove dead skin after your foot peel. Just let the process play out. If you pull, tug or tear the skin, you might regret it. You’ve been warned!
- Don’t reuse the gel or booties. Maybe someday, but Baby Foot is a one-time-use product for the foreseeable future.
Pass these tips along to all your friends and family, especially anyone who says their Baby Foot peel didn’t work the first go-round. We want everyone to experience smooth, soft feet after the peeling phase ends. Please contact us with any questions you have!